

Whether moving out to a new place or getting a roof replacement, you need to know how the roofing installation process goes before hiring someone.
Although you won’t help roofing contractors do their job, everyone should understand the services they are paying for. Do you want to learn the step-by-step roof installation process? This is the page for you! Read on to learn the standard process roofing companies perform when installing a new roof!
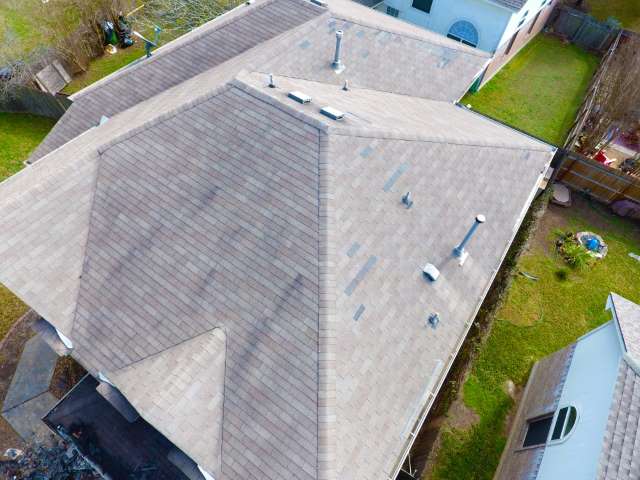
Are you looking forward to installing new asphalt shingles on your house or changing your old roofing material? Don’t hesitate to call Water Damage and Roofing of Cedar Park! We are ready to help you address all your roofing-related needs, so you only need to schedule a roof evaluation with us and tell us what you want.
1. Remove Your Old Roof
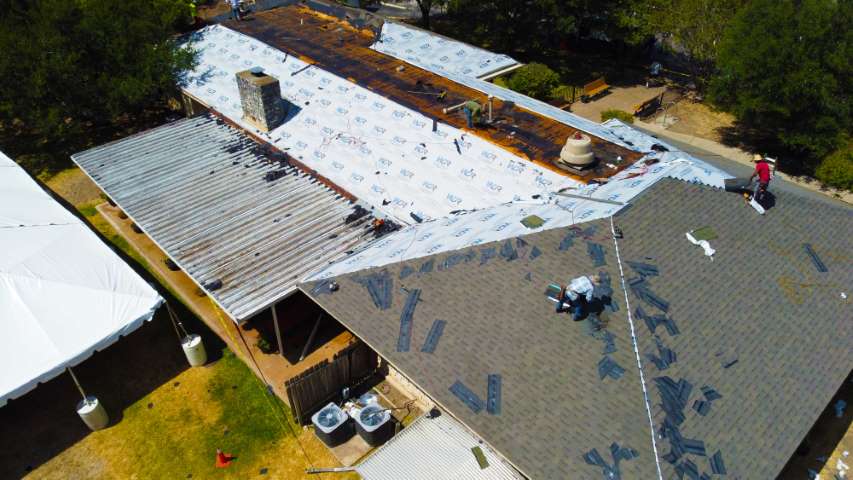
The first step in the roof installation process is removing your old roof and shingles, solar panels, and roof-mounted antenna. Some people think they can avoid doing this by installing new shingles over the old ones, but this could damage the structural integrity of your roof and skylights, so let roofing professionals take care of everything for you.
Regardless of the roofing service you pay for, the company you hire needs to make sure that the debris that falls while they perform the roofing process doesn’t damage any part of your house or hurt anyone.
2. Conduct a Roof Evaluation – Choose the New Roofing Materials You Want
If you have already removed what was left of your old residential roof on your entire property, it’s time to start thinking about your new roof. Personnel from the roofing company you hire should conduct a roof evaluation to know what material is best for you and how they should process it.
We recommend you spend all the time you need thinking about the materials you want for your roof installation since they offer different benefits. All roofing materials are typically installed using the same process, but depending on your option, things can change a bit. Now may be the time to switch to galvanized flashing.
 3. Check Rotted Sheathing
Roof sheathing is one of the most important parts of installing new roofs since it’s a process that focuses on adding extra protection to your new household. You can use this part of the roofing process to waterproof your roof and make it more resistant than others.
It’s common to see people talking about rotted sheathing when installing shingles since they tell you all the exposed nails, tear holes, and repairs you need to take care of before installing your new roof. Hence, ensure your roofing contractors keep an eye on your roof’s wood and plywood before spending more money on the matter.
 4. Install the Roof’s Drip Edge
Installing your roof’s drip edge protects you from heavy rain and storms since it prevents water from entering the roof system after a storm. The thing about installing the drip edge of your roof is that you don’t need to do it, so it’s an optional step.
However, we recommend you install the drip edge before installing your roof underlayment since it gives it a better look and finish. A decent edge is ideal for people who don’t want their starter shingles to deteriorate or water to fall through fascia boards.
 5. Install the Roof’s Underlayment
While the previous step protects people from heavy rain and storms, underlayment protects you from ice dams and strong winds. Ice and water can highly damage roofs, so you shouldn’t take this for granted. You may need some nails to keep the roof underlayment unless the material sticks on its own.
When this happens, all your property should be covered with tar paper since that increases the roof’s fire rating.
 6. Install your Chosen Roofing Shingles
After doing all those things, you can install your chosen roofing shingles! The best way to do this is by starting with starter shingles to ensure they overlap when you finish the job. Starter shingles are the first row of flats, which are less comprehensive than regular shingles. You may need longer nails for this. If you’re switching to a metal roof, follow the manufactures instructions for the metal tile.
The final shingle installation process is tedious for the one who performs it. Still, it’s not that difficult to understand since it mainly consists of overlapping all shingles and securing them with a nail gun. Roofing companies need to have attention to detail since that prevents shingles from falling in the future and will give your roof a long span of life..
7. Final Cleanup and Final Inspection
Getting to the last step of roof installation, workers only need to seal everything up, inspect if there aren’t any issues they need to repair, and clean the whole place up. This includes cleaning your house, gutters, landscaping, and yard.
 Bottom Line – Choose the Roofing Material You Want for Your New Roof Now!
We understand roof installation may seem a bit long and complex if you have never gone through it, but roofing companies are always there to simplify and smoother the process.
Water Damage and Roofing of Cedar Park is available for all clients in Cedar Park, so they can call us anytime they feel like making roof repairs or replacing their whole roof!